
Your own Hiwra.
From the first command.
Install on a fresh VPS, connect your domain and create your community administrator.
Before you begin
- A fresh, dedicated VPS with root access. Do not install over an existing website or hosting panel.
- At least 4 GB RAM, 8 GB recommended; 15 GB free disk space.
- A domain pointing to your server, with ports 80 and 443 reachable.
Install on your server
Connect to the VPS as root and run this command. It installs the required tools and starts the secure setup.
bash -c 'set -euo pipefail; if ! command -v curl >/dev/null; then if command -v apt-get >/dev/null; then apt-get update -qq; apt-get install -y curl ca-certificates; elif command -v dnf >/dev/null; then dnf install -y curl ca-certificates; else exit 1; fi; fi; f=$(mktemp); curl --proto =https --tlsv1.2 -fsSL "https://lumaqode.site/install.sh?channel=beta" -o "$f"; bash "$f"; rm -f "$f"'Open the private link printed in your terminal:
https://YOUR_SERVER_IP:9444/#YOUR_PRIVATE_SETUP_TOKENThis link is private and expires after two hours. Match the temporary certificate fingerprint with the terminal before continuing.
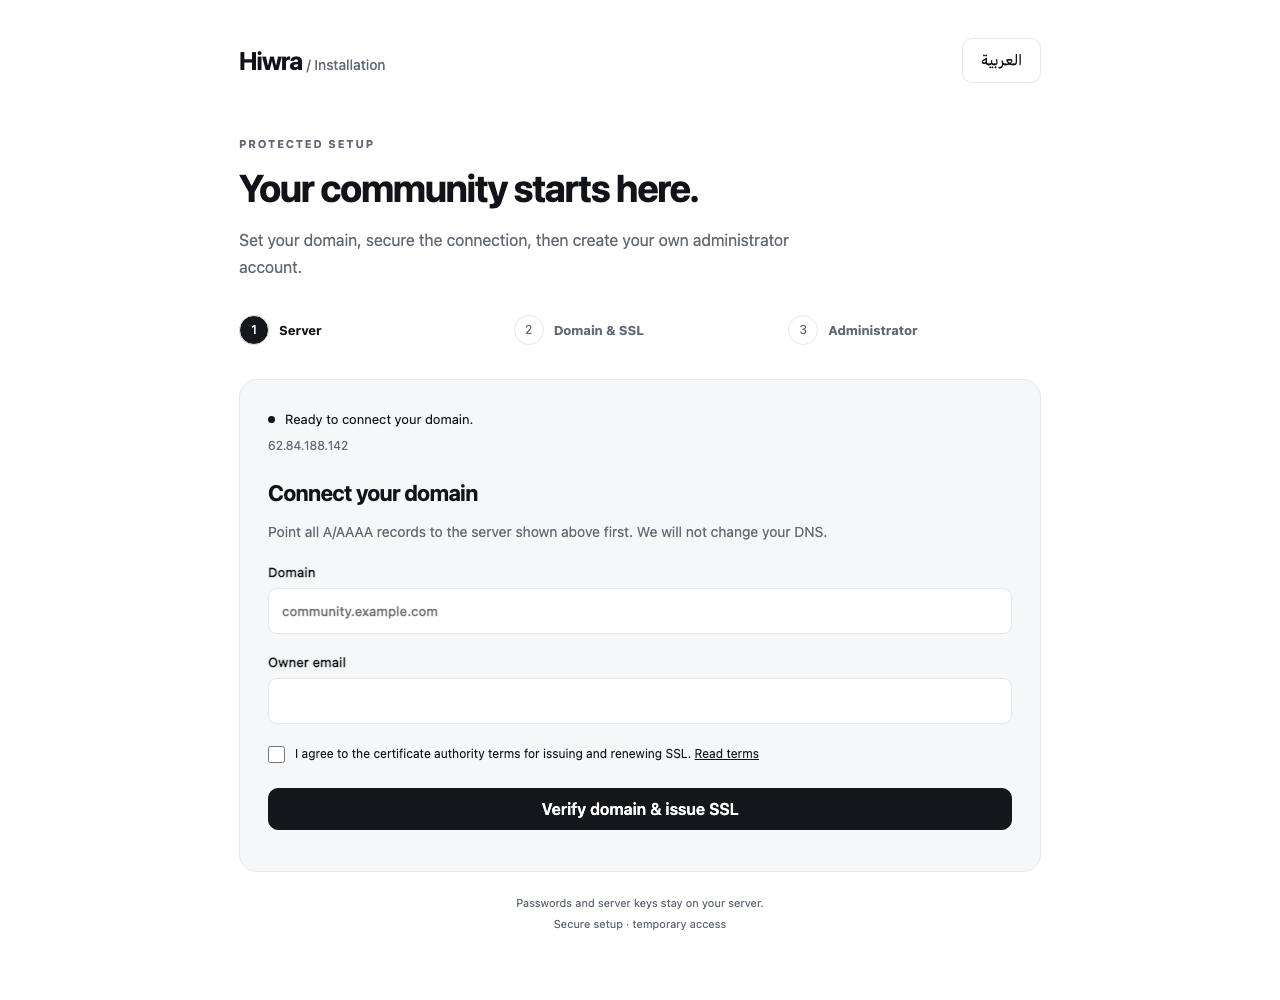
Connect your domain & HTTPS
- Point the domain's A record to your VPS. Any AAAA record must point to the same VPS. Use direct DNS during setup.
- Enter your domain without
https://and provide an email for certificate notices. - Review the certificate authority terms, then select Verify domain & issue SSL.
You will continue automatically at https://YOUR_DOMAIN/setup/. Temporary access on port 9444 closes. Certificate renewal is automatic.
If your provider has an external firewall, remove its temporary 9444 rule afterward. The installer can close only its own local access.
Create your administrator
Enter your name, date of birth and a password of at least 12 characters. There is no default administrator password.
Review the platform policies and installation registration notice. Registration shares the domain, public IPs, version and platform; contact email is optional. User content, passwords and server keys are not sent.
Open administration and configure your branding, policies, account rules and optional services before inviting users.
Connect your mobile apps
In your administration dashboard, open Application distribution and download the Dart configuration. Replace apps/mobile/lib/config/instance_config.dart in your app source and build it using your own signing credentials.
Set up email delivery
Use your own SMTP provider, or configure the optional local sending service on a dedicated supported server. SMTP credentials stay on your server.
For local delivery, your provider must allow outbound port 25 and configure reverse DNS (PTR). Publish the SPF, DKIM and DMARC values shown by the mail setup. Do not add duplicate SPF records or replace existing mail routes.
A working connection is only the first check. Send to a mailbox you control and check actual delivery and message authentication before enabling public registration.
After setup, run python3 /opt/hiwra/installer/mail_setup.py on your own VPS to configure sending. For local SMTP, publish the displayed DNS values, then run it with --activate-local. A failed DNS check leaves application sending disabled.
The optional service sends Hiwra's account and security messages; it is not a general-purpose webmail or inbox service.
Voice & video calls
The installer includes LiveKit and TURN, with a certificate and local service credentials. Enable calling in your administration settings when your network is ready.
Required network ports
| Service | Ports |
|---|---|
| Website & certificate | TCP 80, 443 |
| Temporary setup | TCP 9444, closes after setup handoff |
| Calling transport | TCP 7881, 5349; UDP 7882; TCP/UDP 3478; UDP 49160–49200 |
Provider firewalls are separate from your server firewall. Test calls across different networks; restricted networks may block non-standard TURN ports.
Update when you are ready
- Open Administration → System updates.
- Check the release notes on your chosen Beta or Stable channel.
- Choose the available update and confirm.
Updates come from the official distribution site. Your server verifies the signature and builds the candidate before upgrading Hiwra. A short interruption may occur.
Early Beta installations do not replace privileged installer components through an application update. New optional system services may require a separately reviewed installer upgrade.
Keep your own recovery plan. If an update stops during a database change, preserve data and repair forward; do not restore an incompatible older worker or delete migration records.
Moving your installation
Your domain and mobile endpoints are configuration, not a permanent part of the platform. Preserve the database, media, message-encryption key and other server secrets when moving.
Configure the new domain, certificate and provider callbacks, then download a fresh mobile configuration. Test sign-in, private attachments and calling before switching traffic.
Need a hand?
Domain verification fails: check all A/AAAA records and incoming port 80.
The private setup link expired: use the original server terminal to inspect setup; never share its token.
Media or calls do not work: check the Hiwra media service, required codecs and provider firewall rules.
Email goes to junk: verify SPF, DKIM, DMARC, PTR and provider reputation; a successful install cannot guarantee Inbox placement.
Contact [email protected]. Share the error message and version, never passwords, private keys or setup tokens.